
Another eventful weekend at the cabin! Now that we have power coming in to the place, we were ready to test out the well, but never having had one before, we weren’t quite sure how it works. After a brief conversation with our trusty contractor, Todd Hawkes, we realized all we had to do was hook a hose to the small water tank in the basement and then flip a switch in the circuit box to turn on the pump to the well….lo and behold, it worked!
-

- first, flip the switch that powers the well pump
-

- next, hook the hose to the water tank
-

- aaahhhhh, we have WATER!
-

- ooooh, I hope it doesn’t stay this color!
-

- whew, it does run clear
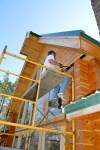
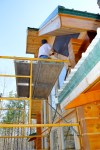
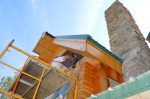
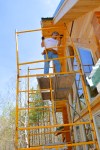
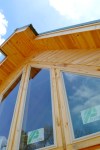
Next on the agenda was to finally tackle removing, and then replacing, the log siding along the right side of the great room window so that it lines up with the siding on the left. When the builders originally placed the siding, they ended up with a one + inch gap between two pieces on the right side and rather than fixing it, just cut a thin strip of siding to fill in the gap… unfortunately, we didn’t notice it till they were gone. Although we briefly considered leaving it, we knew it would always bug us if we didn’t go ahead and make it right. In order to correct the mistake, we figured out that if we just spaced out the siding pieces about an 1/8 of an inch more than they had been, it would make up the difference and line the two sides up properly. Thankfully, it all went as planned and, aside from the precariousness of having to work from the third level of the very wobbly scaffolding (which was much higher than in looks on camera!) it worked out perfectly and now we can move on to finishing the stain on the outside.
-

- Dave begins the tedious job of removing the siding
-
- as expected, the pieces rip apart as he removes them so we’ll have to cut new pieces
-

- this shows the thin strip of siding that had been used to fill in the gap
-

- from inside the cabin…
-
- he’s much higher than he looks in the photo and this was before adding the third level of scaffolding!
-
- moving right allong..
-

- Dave, cutting the new siding pieces
-

- prepping for the first new piece to go up
-

- now, let’s see if our plan will work!
-

- up goes the first new piece, spaced out a little more than before
-
- nailing it the first piece….
-

- so far so good!
-

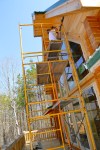
- ready to put up the third level of scaffolding
-
- careful Dave, don’t put it through that window!!
-
- a little nervous about the unsteadiness of the scaffolding, Dave begins to remove the last of the siding
-
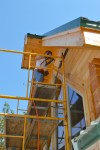
- having removed the last of the old siding he moves on to replacing it
-
- excellent, the last piece fits in perfectly!
-

- nailing in the last piece
-

- Dave is much relieved at this point that he will soon be able to come down to stable ground 😉
-
- and, it’s done
-

- SO much better and you can’t even tell that it’s been spaced apart on the right!
Our other tasks of the day were to finish connecting bathroom the vent pipes, wiring the outlets in the basement and to begin sanding the deck rails.
-

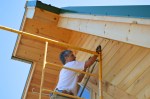
- while Dave was tackling the siding issue, I began the tedious task of sanding the deck rails…taking many breaks to photograph Dave’s progress, I only got as far as this one section
-

- Dave finishes the task he had begun last week
-

- connecting the pipes for the bathroom vents
-

- on to wiring the outlets
-

- attaching the wires to the socket
-
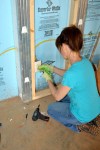
- first outlet done, ten more to go!

Recent Comments