
Saturday morning Dave went down ahead of me so that he could be there when our stain was delivered. We had initially planned to do the staining ourselves but when we saw first hand just how high the second story is on the back of the cabin where the double wall of windows will be, the more daunting it seemed. We made the command decision the day before that we would have our Battle Creek crew go ahead and do it while they were here, given that they had all the necessary equipment and knew what they were doing. However, this put us in a time crunch as the forecast for the next week was freezing temperatures and snow flurries. Mr. Lipham said that if we could get the stain overnighted, they could start staining by Sunday and be finished before the icy temps set in. After much back and forth, it was decided that the cheapest way to have it overnighted was to pay a driver to drive it down from Tennessee. We also had to make a quick decision as to which color to choose. After attending the Permachink talk at the Chantilly Log and Timber show, we decided to go with their Lifeline Ultra-7 line as it had the best reviews and only requires one coat. This left us with fewer choices, none that really jumped out at us. In the end, after talking with Mr. Lipham about it and listening to his advice, we went with the Oak.
The stain arrived as scheduled and the crew went to town trying to get everything done on the outside in order to start staining on Sunday.
-
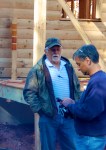
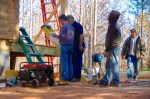
- Dave making the call the previous day to order the stain…we chose to go with Oak, which is the second one from the top on the sample behind Mr. Lipham
-
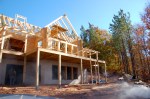
- completed decorative timbers on the front porch entrance
-

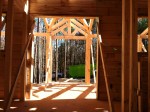
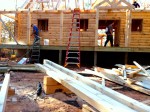
- dormers were framed in on the second floor bedrooms
-
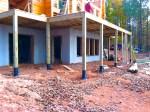
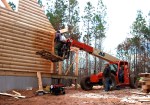
- deck posts were placed and wrapped
-
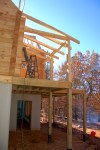
- heavy timbers were placed to support the deck roof
-

- the temperature had already started to drop and the wind was picking up so the crew had two fires going today
-

- Dave places rocks around the fire to try to keep it from spreading to the dry leaves lying close by
-

- much safer!
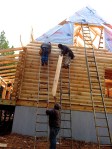
By Sunday, the log siding was ready to be placed. The full timber logs make up the first floor walls as well as the double story wall around the windows in the great room, while the two second story side walls are framed, covered with OSB and then covered with the log siding. Once it is finished and stained, they will look like logs as well. Once the logs and siding are finished, caulking is placed, if desired, in areas where there are slight gaps. While the crew was on lunch break, Dave decided he would pick up a caulking gun and start doing a little caulking himself. Clearly none of the crew members know that Dave has done his share of caulking in the past. I heard a quiet muttering in Spanish behind me as one of the crew members tried to catch Miguel’s attention to let him know what was going on. Next thing we knew, several heads appeared around the corner of the front porch as everyone came to see what was going on. Miguel promptly came over and removed the caulking gun from Dave and proceeded to do it himself. Lunch break over!
-

- log siding going up on the second floor

-
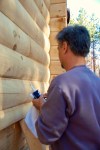
- Dave picks up a caulking gun
-
- a few of the logs have slight gaps that need to be filled before staining
-

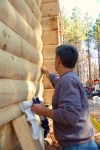
- Miguel quickly steps in and takes the caulking gun away from Dave 😉
-

- Miguel continues caulking
-
- Dave and Mr. Lipham review the blue prints
-

- OSB is placed over the band board to prepare for log siding…low on OSB, the crew cleverly cut up and used the walls of the crate that the windows had arrived in
-

- a piece of log siding is cut in half lengthwise to match up with the half log above
-

- a full piece of log siding is placed under the half strip
-

- Miguel and Mr. Lipham go over to fill a bucket with water…
-

- Miguel turns it on a little to fast…oops!
-

- yep, Mr. Lipham, this IS going on the blog, but don’t worry, we’re laughing with you not at you!
-

- they begin to bleach the logs to prepare for staining
-
- mud is power washed off the deck first, then bleach is applied

-
- after bleaching the logs, a coating of Borate is applied to control for insects
By the time the caulking had been finished, the wind had really picked up and the command decision was made to call it a day and wait till Monday morning to start staining. Just as well since ideally the caulk needed to set for 24 hours before applying stain.

Poor Dave!! There he was, caulk in hand, just doing his thing. Rather bold of Miguel to make him stop.
It was pretty funny from where I was standing!!! ;-D
My wife and I love your Cabin. My family and I are thinking of building our own and we want to use Battle Creek Log homes as well. I don’t mean to intrude, but I would love to chat with you via email or phone regarding your experiences. We plan on building ours on Great Lake Sacandaga in upstate NY. Please email me if possible. Thank you, either way it’s a beautiful place.
Regards,
Tom