
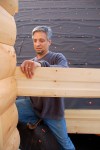
Okay, so I got a little behind with my bloggin’ over the holidays…bear with me, a lot has been happening so this is going to be a long one!
When the JM Logcraftsman crew left on Thanksgiving Day, there were still a few things left unfinished. They had run out of log siding for the second time so were unable to finish one of the dormers and, therefore, unable to stain them as well. In addition, the original basement windows that had been delivered with the rest of the kit ended up being the wrong size so new windows had to be ordered but had not yet arrived before the crew left. The wiring on the second floor was also incomplete and that which had been done was done incorrectly as, once Andy left, it had been left to be completed by one of the crew members who was unfamiliar with wiring. The original plan was for Mr. Lipham, Andy and one other crew member to return the first week in December to finish these three things, as well as to finish staining the outside of the cabin. The first week turned into the second week, which then turned into no communication from anyone as to when they might be back.
Granted, this was all during the holiday season and Mr. Lipham had also taken on building another cabin in Arkansas so I have no doubt that he and Andy both were being pulled in all different directions. Having said that, regardless of what is happening on their end, the fact of the matter is that our place is still unfinished and we need to move forward. Our local contractor, Todd Hawkes, had lined up people to start the plumbing, the HVAC and the roof and they were all ready to get started. Unfortunately, the dormers in particular had to be completed before the roof could be put on so, still hearing no date for Mr. Lipham to return, Dave arranged with Battle Creek to have the log siding and basement windows to be delivered directly to us so we could move forward.
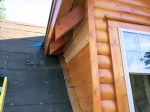
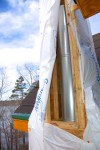
Finishing the dormers
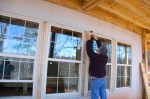
Although the log siding had yet to arrive, we went down the weekend before Christmas to start staining the dormers in the front so that the roofers could at least start on that side. Dave also wanted to change out the trim on the arched window over the entrance as, on closer inspection, we realized it was less than spectacular to say the least. By the time we finished the front dormers and had stained what we could in the back, the siding arrived so the following weekend we were able to get that up and finish staining the last dormer so the roofers could begin.
-
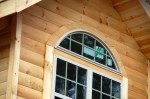
- the original trim over the arched window was just pieced together rather than cut from one piece of wood
-
- maybe not noticable from afar, but really would look much better replaced
-
- Dave cuts the new arched trim
-
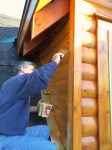
- caulking the nail heads prior to staining
-
- Dave prepares the sprayer…it’s messy but makes the staining process much faster
-
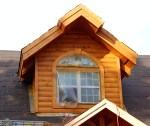
- and voilá, MUCH better…yea Dave!
-
- arch trim redone and front dormers stained…much better!
-
- day two, Max joins us out on the roof to lend a hand
-

- applying the finish coat
-

- Dave, ready to move onto the back
-

- Dave starts our trusty generator
-
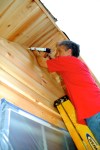
- measures the log siding to finish off the last dormer
-

- he cuts the siding the correct length
-
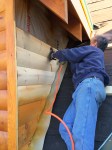
- and then uses a nail gun to attach the siding in place
-
- one side finished
-

- and the other finished
-
- onto finishing the staining
-

- rear dormers stained…we will have to rent a lift to stain over the great room windows
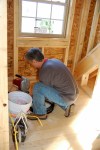
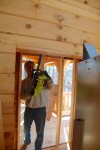
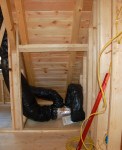
Putting in the basement windows
Meanwhile, the new basement windows had also arrived. Thankfully, they proved to be relatively simple to put in and made a huge difference in the amount of light in the basement once they were in.
-

- another icy day at the lake…thank goodness for our kickass turbo heater!
-

- see, icy…there were ice crystals formed in the muddy areas around the outside of the house
-
- the basement windows had been covered with plywood till the new windows arrived
-
- first order of business, remove the plywood…what a difference in the basement!
-

- three windows in…
-
- Dave nails in the last window
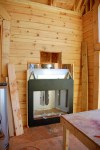
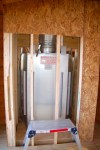
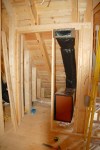
Putting in the fireplace/chimney insert
One of our next goals is to get the fireplace in working order so we can warm up the inside of the cabin to make working on the inside a little more pleasant during these coming winter months. Over the past few weekends we’ve been making progress and were finally successful this past weekend in getting the last of the chimney inserts in place and closing up the chimney.
-
- Dave uses the chainsaw to make the opening large enough to allow for the chimney insert to go in
-
- still not large enough
-
- a perfect fit….we need to allow 2″ between the chimney insert and the walls
-

- now to get the inserts in place…
-

- an hour later, we finally figured out how to get the elbow pieces in properly!
-
- looking from the back of the fire place… this is taken from the deck, just outside the master bedroom
-

- a close up of the elbow joint
-

- Dave secures the insert to the sides of the chimney walls
-
- now to insert the longer sections
-
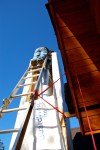
- the next two inserts in place, we now need a taller ladder before we can go any further
-

- Dave builds a platform on the roof on which to rest the ladder…there is no off to the genius switch 🙂
-

- ladder in place….yep, I’m freaking out a bit at the idea of him going up the ladder with only me as his last defense if it tips
-

- hopefully this tie in will help stabilize it…makes me feel better anyway
-
- after much effort, Dave is able to get the last pieces in place and places a piece of duraroc at the top
-

- now to cover it back up
-

- Dave puts the plywood cover back on the chimney
-

- Max comes out to give Dave a hand
-

- Dave decides to add another 2×4 up the center for more support
-

- Max helps Dave screw the plywood in place
-
- Max takes a break and does his best baby bird impression
-

- Max, checking out the new roof on the other side
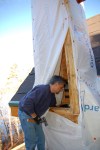
-

- back down again, he helps Dave cover the chimney it Tyvek to keep the rain out
-
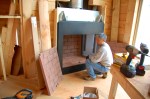
- back inside, Dave puts the firebox walls in place
-

- almost ready for a fire….eventually, we will have stone around the outside
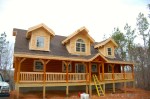
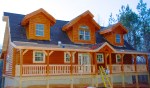
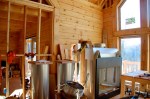
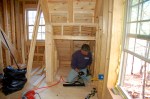
HVAC & Plumbing & roof
While we’ve been busy with our projects on the weekends, there has been much going on during the week as well.
-
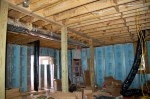
- HVAC is coming right along

-

- air vents and returns are popping up everywhere
-
- Todd Hawkes (on the right) discusses the laundry room with the HVAC and Plumbing contractors
-

- more creative plumbing
-

- plumbing and dryer vent in the laundry room
-

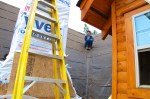
- Todd, up on the roof with his roofing crew
-

- Dave and Todd discuss the progress
-

- our new roof….awesome!
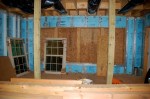
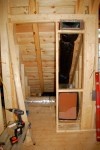
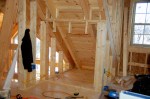
putting in the knee walls
Initially, we wanted to keep the tongue and groove of the roof exposed on the front side of the upstairs bedrooms and build knee walls on the back for storage. However, once the air vents and pipes were placed, we had to rethink which walls we were going to keep exposed on the second floor.
-

- initially, we were going to leave these open
-

- the right side had to be closed in
-
- a frame needed to be built around this return and vent
-
- done
-
- another knee wall needs to go up here
-

- knee wall up, check
-

- This side had been closed in by the building crew…we needed to open it up to frame for a door so we can use it for storage
-
- Dave removes a section of the 2x4s
-
- and builds a frame for the future door
-
- framing the second door opening

-

- ready for future storage
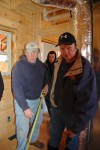
A visit from Dave’s folks
Although Dave’s parents have been avid blog followers, they haven’t had a chance to get down here to check the place out since construction began. Fortunately, they were able to come down and spend Christmas with us and we brought them down on Boxing day to take a look around.
-
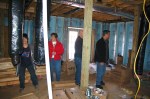
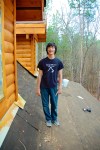
- Max, Betty, Frank and Dave check out the basement
-

- Max and Grammy goofing around with HVAC scraps…hey, they looked like top hats to me! too
-

- Grammy, always ready for mischief, sees a piece of unused pvc pipe that begs to be hollered in to
-

- Max tries his hand at yodeling
-
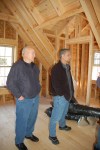
- Frank and Dave check out the upstairs bedrooms…I think Todd Hawks might be talking at them here
-
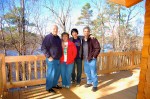
- Three generations of Kings…Frank, Betty, Max and Dave

Recent Comments