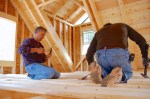
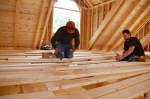
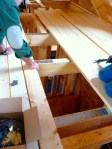
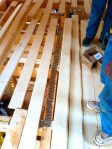
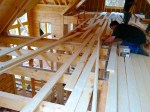
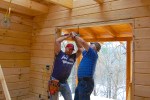
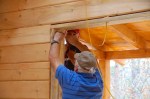
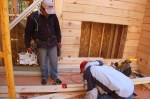
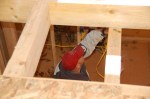
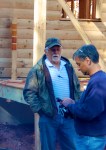
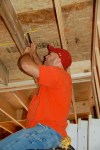
First thing on today’s agenda was hammering down hundreds of metal plates over the wires along the second floor so the tongue and groove flooring could be put back in place. Dave pitched in and helped so that it would move along a little faster…this time, unlike the caulking incident, Miguel seemed happy for the help. 🙂
Miguel is very happy to have Dave’s help on this one
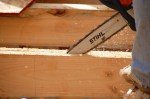
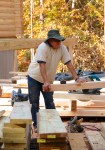
Dave tapping away at the metal wire covers
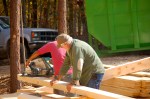
Mr. Lipham pitches in to help as well
tedious work to say the least!
almost there!
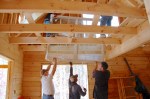
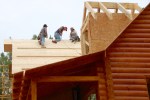
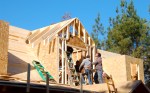
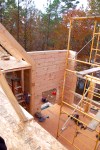
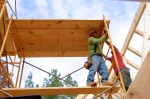
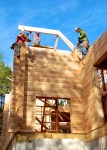
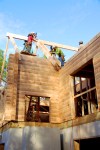
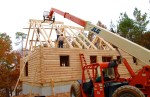
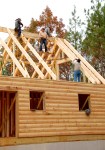
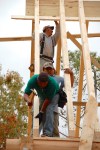
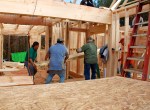
Once the wiring issue was taken care of, it was onto the windows!
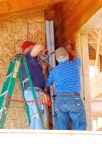
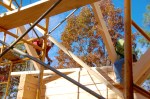
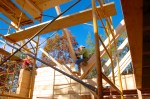
bringing up one of the windows from the basement
up the stairs they go
over to the breakfast area
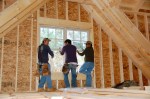
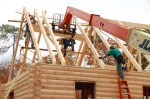
getting ready to hoist it up to the second floor
ready…steady…
lift…
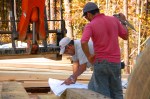
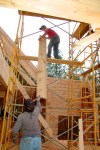
Mr. Lipham, Carlos and Raymond hand it off to Miguel and Nelson on the second floor
and it’s in
here it is from the outside
on to the breakfast room window
and the kitchen window
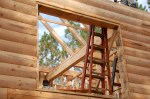
on to the rear dormer windows
guest room window
front dormers are next
est voila!
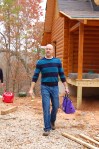
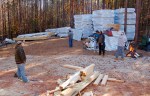
Max had come down with us and spent the first half of the morning working on homework. When it was time to clean up, we all pitched in…there was sawdust and wood scraps everywhere so I picked up the broom while Dave showed Max how to blow off the sawdust with a leaf blower. He was supper psyched when Mr. Lipham let him switch out our puny leaf blower for his giant one.
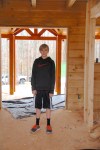
Max checks out his room for the first time
enough with the pictures, Mom
Max uses our puny leaf blower to blow the sawdust out of the house and off the deck
Mr. Lipham hands him his own…now THAT’s a leaf blower!
Dave’s BFFs, Dan and Steve, along with Dan’s son Matthew, met us for lunch at our local haunt, El Caporal, then drove out with us to check out the progress of the cabin as neither one had been down since we’d started the log construction.
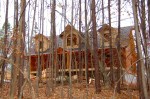
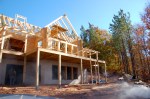
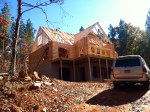
the front of the house today
I think Dan likes the place!
Dave catches Steve up on what’s going on
beer and guns…Dan has come prepared
Matthew poses for a photo at the front door
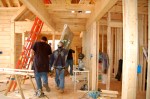
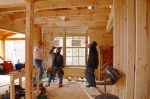
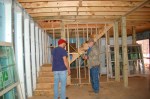
checking out the kitchen and breakfast room
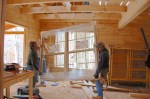
Dave shows the boys the wiring along the breakfast room door frame
Steve steps out to the edge of the deck and pretends he’s not afraid of heights 🙂
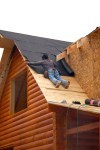
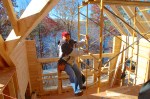
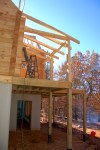
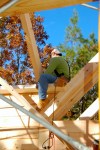
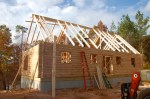
around back, Mateo, Nelson and Carlos are working on the dormer roof
after the t & g is down, they begin to lay the roof felt
Raymond and Miguel work on the other rear dormer
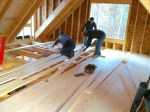
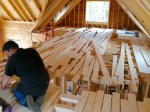
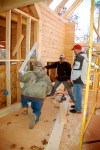
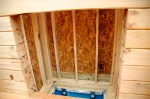
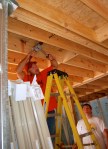
Dan, Steve and Matthew took off to the other side of the property to do a little target practice while Dave went up to the second floor to check things out. He soon discovers that the the tongue and groove flooring has been nailed down directly on top of the wiring that runs between the t & g and the first floor rafters without first putting down the protective metal plates. The purpose of these plates is to keep the wires from being damaged by nails when the flooring is placed. Without them, not only is there danger of one of the wires being damaged, but we also won’t pass inspection without them. Dave calls attention to this error to Mr. Lipham, who promptly has the crew remove all the flooring and put the plates down over the wires. And there’s another day lost.
tongue and groove flooring in the kids room…
the guest room…
and the second floor bath
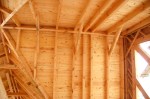
t & g of the 1st floor ceiling/2nd floor flooring and new H beam for the breakfast room light
Dave discovers that the metal plates have not been put down over the wires
this is what should be covering the wires
up comes the tongue and groove
hodge podge of recently removed t & g
this is what the covered wires should look like
While all that craziness was going on, I took my camera for a walk. It’s been a full year since we first set eyes on this place and it’s beauty still astounds me. I find myself taking pictures of the same spots over and over, but with each season the colors and the lighting changes and I just can’t resist trying to catch each different setting on film. I particularly love the bright green moss that grows along the rock ridge and between the gnarled roots of the old beech trees.
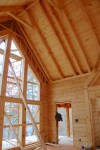
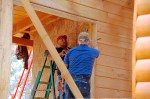
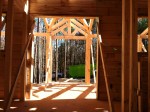
We both missed going down last Thursday to check out the progress on the cabin and were completely astounded when we arrived Friday at the site of the great room ceiling! We’d seen countless photos of the interior of many a two story great room in our Log Home magazines but were still unprepared for what we walked into that morning…it was simply breathtaking.
looking up at the guest room
and on the other end, the kids room
looking out towards the front door and the guest bath above
the fireplace
another view of the guest room and second floor bath
the great room door onto the deck
looking back at the kitchen with the kids room above
looking straight above in the great room…Andy was right, with the cross ties and t & g in, the off center beam is not an eyesore, thank goodness!
another view above of the off center beam.
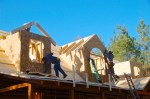
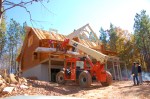
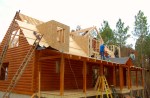
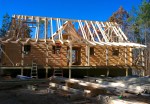
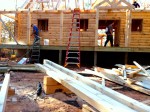
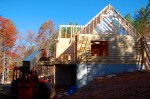
Most of the crew worked outside putting up more log siding, finishing off dormers and laying down more roofing felt. They’d been working particularly hard so we thought we’d bring in pizza for lunch.
pizza break!
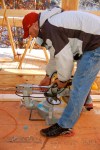
outside, the crew works on placing log siding on the great room peak
cutting the log siding
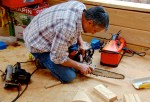
Dave steps in and sharpens their chainsaw blade
covering the dormer roofs
Miguel lays down more roof felt
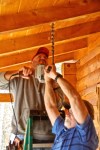
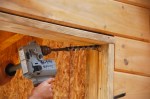
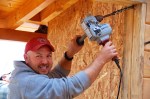
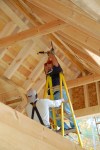
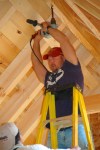
Although some of the first floor wiring had been done, we hadn’t witnessed first hand just quite how difficult some of the wiring would be. As I had mentioned in a previous post, all of the wire has to be hidden in window and door frames, across the first floor rafters and under the second floor t & g, and also up over the roof for the second floor ceiling lights and fans . This requires drilling through the heavy 12″ timbers and running over half a mile of wire, all to be connected down in the basement.(I’d somehow turned off the autofocus on my camera so some of the photos are slightly out of focus. Boo.)
Andy wires for the deck lights
Mr. Lipham steps in to give his son a hand
it takes the two of them to drill through some of the beams
this one was particularly difficult…
still drilling….
he seemed to be struggling so I offered to take over…much laughter ensued for some reason 🙂
a brief rest…
Andy puts in everything he’s got…
and voila, it’s through but takes some effort to remove the drill bit
Dave and Andy discuss electrical box sizes
another team effort by father and son
it’s stuck!
hey Andy, do ya think you should be wearing safety goggles maybe?!
next, Andy goes up to the highest point of the roof to drill the hole for the great room fan!
and it’s through! (right where the off center beams meet)
a little off center but it’s through and will be covered by the fan base anyway
Andy seems a little worn out…why, I wonder?
Andy and Mr. Lipham discuss what still needs to be done
all of the wires have to be run into the basement to the electrical box
Dave checks out the circuit box
our awesome father and son team, Andy and Kenneth Lipham
Andy had to leave at the end of the day to drive back to Alabama and I must admit, we were sad to see him go. He has added such a positive energy to the work site, constantly laughing, helping everyone out and keeping the entire atmosphere upbeat. Before he left, he told us not to hesitate to call if we need help while we’re finishing the inside of the cabin…we may just have to “create” a problem so we can call him to come help us out! ;-D
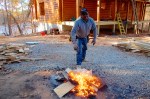
Another unusually chilly and windy November morning on Colemans Lake. I spent most of my time sitting by one of the two fires we had going!
Miguel throws a few pieces of scrap on the fire in front of the cabin
around back we have a second fire going
a lovely spot on such a blustery morning!
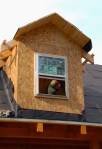
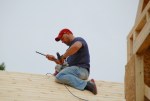
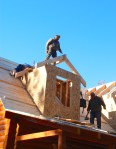
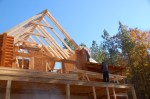
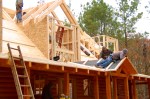
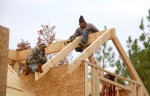
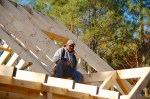
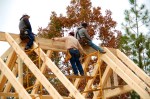
The crew continued to put down the tongue and groove on the roof and to close in the front dormers today.
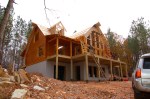
the front of the cabin this morning
Miguel and Raymond continue to work on the roof while Carlos closes in one of the dormers
Talon frames in the middle dormer window…this will be the upstairs bathroom window
a template for the arched window is made
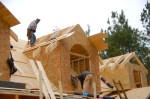
Carlos and Raymond begin to place the dormer rafters
a second rafter is in place
from the inside of the middle dormer, Talon works on framing the arch for the window
Talon has quite the array of hats but this is still my favorite
looking up and the second floor dormers and tongue and groove that was just placed on the roof
OSB is put on the middle dormer
Talon and Gordo continue with the dormer rafters
more progress on the dormer roof thanks to Talon
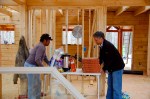
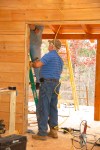
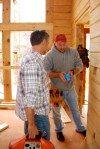
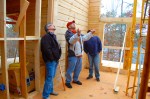
While most of the crew worked up on the roof, foreman, José, and our multi-talented electrician, Andy, worked on building the frames for the wall of windows in the great room while Dave and Mr. Lipham discussed our ideas for our fireplace.
Dave and Mr. Lipham discuss the fireplace
Mr. Lipham , José and Andy discuss the framing for the great room windows
José and Andy begin to measure boards for the great room window frames
Andy cuts the boards
a pattern for the window frame is drawn on the floor…
José and Andy match the boards to the pattern on the floor
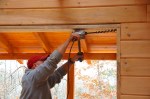
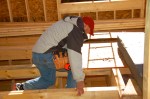
After helping with the window framing, Andy does a little more wiring while Carlos, Nelson and Mateo start placing the tongue and groove roof around back.
the the t & g of the front roof in place, Miguel and Raymond even off the side edge
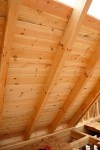
from the inside, the t & g of the bedroom ceiling looks awesome!
around back, Nelson and Carlos begin to place the t & g on the roof
Andy climbs up to run wire on the second floor
….across the rafters…
and back down he goes…
more wiring by our trusty electrician
outlets and lights over the master bathroom sink are wired
a pallet of tongue and groove is brought around to the back
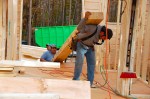
Mateo cuts t & g for the back roof
cross ties for the great room ceiling rafters were put in earlier
Nelson and Carlos wait ever so patiently for more t & g
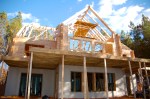
We were very happy to have both Andy and José rejoin our team today! Despite a few snow flurries and crazy cold wind blowing off the lake, the crew started on schedule and began to close in the second floor dormers on the front of the cabin and to lay the first layer of felting on the roof.
Andy, just back from Alabama, pops up on the roof to chat with Gordo
Carlos and Talon work on the rafters over the Guest bathroom dormer while Nelson and Gordo put down the roof felt while Andy hangs out and drinks coffee 🙂
Nelson and Gordo place roof felt over the tongue and groove, then nail down 2″ x 4″s on top of that
it was freeeeezing out and Nelson is up there in a t-shirt!
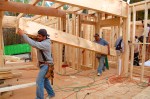
Mateo hoists another timber up to Miguel
this will be the window to the guest bath on the second floor
love Talon’s Hokie hat!
Carlos and Talon continue to build the roof over the bathroom dormer
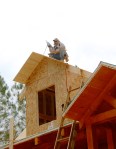
Miguel poses for a photo standing at the highest point of the roof!
While around back, the fireplace box was being closed in, inside Dave discussed with Andy and José whether or not we could remove one of the off center rafters in the great room ceiling. In the end we decided to keep it even though structurally it would have been fine with out it, taking it out would be more of a hassle than it was worth. Andy pointed out that once the tongue and groove ceiling was in and the cross ties up, there would be so much going on up there that we wouldn’t notice it.
nothing like hot coffee and glazed donuts on a blustery morning…oh and jalepenos of course
Dave, Andy and José discuss the off center beam placement above
the off center beam that was driving Dave crazy
second floor bedroom is coming along
the fireplace box from the inside
fireplace box from outside…the master bedroom is to the right
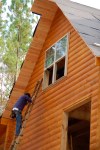
Unfortunately, Max was sick the day the crew started staining the outside of the cabin so I missed the big event. On top of that, Dave forgot to bring my camera with him so what few pictures he took were with his iPhone, which leave a bit to be desired. Better than nothing though and he did get a little video footage:
Getting them to stain the outside for us was definitely a great decision…it would have taken us weeks to do what they did in a day! The process looks pretty simple, one person sprays the stain on the logs while another follows behind with a brush to make sure it goes on smoothly…however, they’ve done it a million times so I think they made it look a lot easier that it would have been.
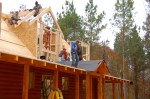
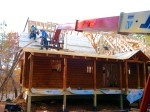
While half of the crew worked on staining, the other men were on the roof putting on the tongue and groove that will make up the ceiling of the cabin.
five buckets of this and we still ran out and had to order more …although they did do two coats rather than one in order to make it darker
once the stain is dry a coat of clear gloss will be applied
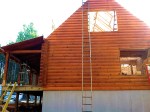
before staining…
and after one coat
one person sprays while another follows behind with a brush
half of the crew worked on staining while the other half began to put the tongue and groove on the roof
half of the crew worked on staining while the other half began to put the tongue and groove on the roof
tongue and groove that will make up all of the ceilings in the cabin
Our concern in choosing the Oak stain was that it looked much lighter than what we wanted and was also had a little more of a yellow tint to it than what we had in mind. The Cedar, on the other hand, was too red and too dark but there was no color choice in between the two. So we went with the Oak stain and decided to put on two coats to make it darker…thank goodness we didn’t go for the Cedar because even the Oak initially looked much darker that we wanted! Thankfully though, it didn’t have the yellow tint that it had in the sample and as it dried it has lightened up a good bit so we’re really happy with our choice. Good thing ’cause there’s no going back!
Saturday morning Dave went down ahead of me so that he could be there when our stain was delivered. We had initially planned to do the staining ourselves but when we saw first hand just how high the second story is on the back of the cabin where the double wall of windows will be, the more daunting it seemed. We made the command decision the day before that we would have our Battle Creek crew go ahead and do it while they were here, given that they had all the necessary equipment and knew what they were doing. However, this put us in a time crunch as the forecast for the next week was freezing temperatures and snow flurries. Mr. Lipham said that if we could get the stain overnighted, they could start staining by Sunday and be finished before the icy temps set in. After much back and forth, it was decided that the cheapest way to have it overnighted was to pay a driver to drive it down from Tennessee. We also had to make a quick decision as to which color to choose. After attending the Permachink talk at the Chantilly Log and Timber show, we decided to go with their Lifeline Ultra-7 line as it had the best reviews and only requires one coat. This left us with fewer choices, none that really jumped out at us. In the end, after talking with Mr. Lipham about it and listening to his advice, we went with the Oak.
The stain arrived as scheduled and the crew went to town trying to get everything done on the outside in order to start staining on Sunday.
Dave making the call the previous day to order the stain…we chose to go with Oak, which is the second one from the top on the sample behind Mr. Lipham
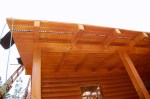
completed decorative timbers on the front porch entrance
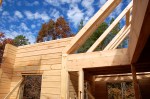
dormers were framed in on the second floor bedrooms
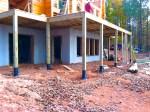
deck posts were placed and wrapped
heavy timbers were placed to support the deck roof
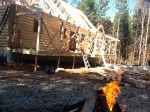
the temperature had already started to drop and the wind was picking up so the crew had two fires going today
Dave places rocks around the fire to try to keep it from spreading to the dry leaves lying close by
much safer!
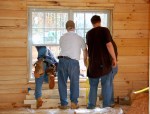
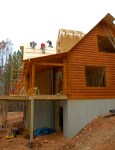
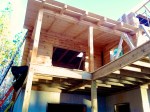
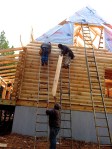
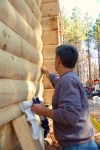
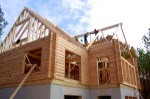
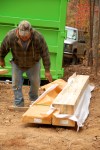
By Sunday, the log siding was ready to be placed. The full timber logs make up the first floor walls as well as the double story wall around the windows in the great room, while the two second story side walls are framed, covered with OSB and then covered with the log siding. Once it is finished and stained, they will look like logs as well. Once the logs and siding are finished, caulking is placed, if desired, in areas where there are slight gaps. While the crew was on lunch break, Dave decided he would pick up a caulking gun and start doing a little caulking himself. Clearly none of the crew members know that Dave has done his share of caulking in the past. I heard a quiet muttering in Spanish behind me as one of the crew members tried to catch Miguel’s attention to let him know what was going on. Next thing we knew, several heads appeared around the corner of the front porch as everyone came to see what was going on. Miguel promptly came over and removed the caulking gun from Dave and proceeded to do it himself. Lunch break over!
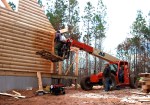
log siding going up on the second floor
Dave picks up a caulking gun
a few of the logs have slight gaps that need to be filled before staining
Miguel quickly steps in and takes the caulking gun away from Dave 😉
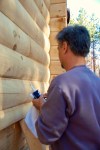
Miguel continues caulking
Dave and Mr. Lipham review the blue prints
OSB is placed over the band board to prepare for log siding…low on OSB, the crew cleverly cut up and used the walls of the crate that the windows had arrived in
a piece of log siding is cut in half lengthwise to match up with the half log above
a full piece of log siding is placed under the half strip
Miguel and Mr. Lipham go over to fill a bucket with water…
Miguel turns it on a little to fast…oops!
yep, Mr. Lipham, this IS going on the blog, but don’t worry, we’re laughing with you not at you!
they begin to bleach the logs to prepare for staining
mud is power washed off the deck first, then bleach is applied
after bleaching the logs, a coating of Borate is applied to control for insects
By the time the caulking had been finished, the wind had really picked up and the command decision was made to call it a day and wait till Monday morning to start staining. Just as well since ideally the caulk needed to set for 24 hours before applying stain.
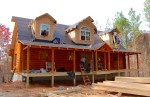
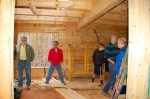
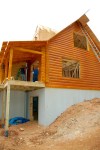
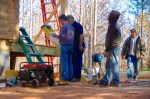
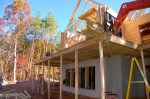
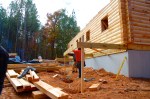
Dave and I both missed going down to watch the building progress last Thursday so got around bright and early Friday morning to head down with the plan to hang out all day. Mom had been wanting to check out the progress as well as she hadn’t been to the lake since just after we purchased the property, so she made plans to come along with us. Building had slowed down a bit the past couple of days as José had to take a couple of the guys off to finish another project that they had previously started. Andy had also returned to home for a few days so we were down to just half the original crew. When we arrived, a few of the men were working on laying the back deck, while the others were around front setting the heavy timber porch frame over the front door.
view of the cabin just after we arrived
they’re building us a cabin- the least we could do was bring them hot coffee to drink on such a blustery day
Mom pulls up a chair close to the fire so she can watch the action
Bingo, always happy for a warm lap to sit in, soon joins Mom
meanwhile, the men are busy putting in the heavy timber frame around the front porch entrance
they had placed the heavy porch posts and roof system since we’d been there last
the porch floor had been placed the previous day as well. FYI – it took 2380 screws to attach the porch floor
the a-frame for the roof is in place
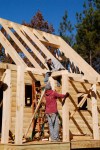
Mr. Lipham brings over the heavy timber for the porch roof- he may not be as spry as he used to be, but he can still carry him some timber. 😉 Do you realize how heavy these things are?!
the pitch on the first frame was slightly off so a new frame was built
working on making a steeper angle for the roof frame
our vantage point from in front of the fire
the steeper pitch was perfect so the crew began to place the heavy timber peak connecting the porch roof to the cabin roof
meanwhile, the other crew members were busy laying down the deck floor
Mr. Lipham checks out the newly laid deck floor
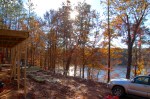
the beautiful view from our deck
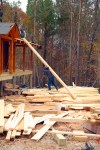
bringing up more temporary flooring for the second floor
the crew breaks for lunch over by the fire…notice the recently delivered roof insulation stacked behind them
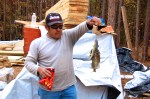
Miguel takes the opportunity to get in a little more fishing
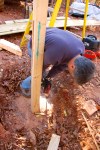
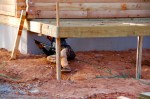
If you know Dave at all. you know that he has been dying to jump in and do a little work himself. He had been fretting for months over the fact that the deck and porch posts were going to be placed directly onto the concrete pads that had been poured and finally decided that he was going to improve upon that plan. He drilled into each concrete block, epoxied a large metal bolt into each hole, and attached metal hangers on which to place the posts upon.
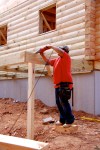
Mr. Lipham and Dave discuss where the porch posts will sit
uh-oh, our first injury
a contractor’s bandage- napkin and electrical tape…duck-tape’s not the only multipurpose tape you know
Dave begins to drill…
and drill…
5″ bolts seemed good on paper, but once he started to drill the concrete, 2 1/2″ suddenly seemed way better
Dave puts me to work blowing the dust out of the holes
time for the epoxy
in goes the bolt
once the epoxy sets, the metal hanger will be bolted down, ready to support the post
I know I’ve posted plenty of photos of the lake and dam, but I just couldn’t help taking a few more…it’s just so beautiful. I will leave you with a few more shots…
Having recovered from the previous day’s setback, our Battle Creek crew was back in action early Wednesday morning. We hadn’t stayed long enough Tuesday to see the three newly replaced beams running the length of the first floor ceiling, so were thrilled to see how awesome they looked. The two 12″ x 6″ beams on either end that will be supporting the second floor bedrooms are lamibeams, while the middle beam is solid timber.
newly replaced lamibeam in the kitchen
solid timber across the entrance way
and, on the right, the lamibeam in the master bedroom
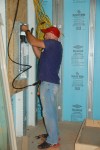
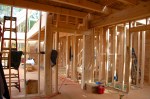
With the first floor framing complete and the temporary flooring back down on the second floor, with the help of one of the other crew members, Andy was able to begin running the electrical wire to the two floors. As they are working with log walls that will remain exposed, the wires need to be run down door frames and across the top of the heavy timbers. Channels need to be cut into the wood before the tongue and groove ceiling and the flooring goes down…the wire will then run along the channels and be hidden.
wire running down the length of the french door to the master bedroom will be covered by the door frame
chiseling the log where the electrical box will sit
Andy uses the chainsaw to cut the channels for the wire
yep, Andy, I’m taking pictures AGAIN
drilling a hole to run wire down to the first floor ceiling
Dave and I popped up to check out the view from the second floor
awesome!
Outside several of the crew members were going to town on the front porch…
looking out the front door
Mr. Lipham lends a hand with the saw
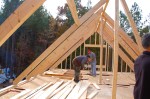
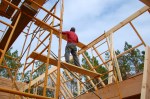
while others continued framing the roof and dormers along the front of the cabin.
foreman, José reviews the stamped blue prints
Mr. Lipham and Bingo keep an eye on everything to make sure all goes smoothly
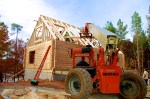
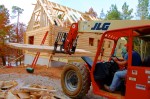
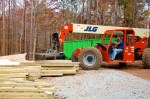
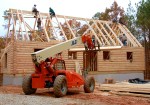
ummm, excuse me, isn’t that our electrician driving the lull?
why yes…
yes, it IS Andy
somehow, I think he’s done this before
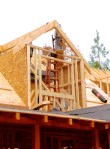
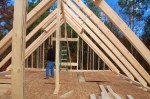
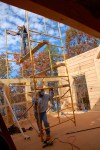
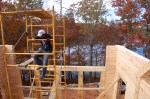
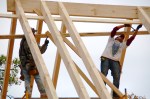
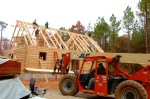
Around back we had yet another group working on framing the roof over the great room. A slight dilemma occurred when the heavy timber peak was put in place and it wasn’t level. After a brief discussion, the solution was offered by Andy, our electrician- Lift the A-frame and place two 2″ x 8″ s on top of the log wall to bring in up to level. Yep, definitely thinking Andy knows a little more about building log homes than just running the wire! I think I forgot to mention in the last post that it was Andy who discovered the lamibeam/timber mixup the previous day.
up goes the scaffolding
next, to build a platform onto the scaffolding
11/12/13- first section of the a-frame in place
a second a-frame section is tied into the first by placement of another heavy timber beam
oh-oh, it’s not level
the section is unscrewed in order to slip in two 2″ x 8″s to lift it higher
wait, who’s that who’s just popped up to help?
hey look, it’s Andy again, jumping in to lend a hand!
re-attaching the a-frame
now over to readjust the other side
back in business, more rafters are placed
After talking to Andy a bit, he told me that he has built log homes before and knows how to do a bit of everything that goes into building a house. However, as much as he loves running wire and building, he only does it on the side. His real life occupation is owner of a Sears store in Alabama. When I mentioned this to Dave, he replied, “hmmm, Mr. Lipham has a son who owns a Sears store. You don’t suppose…..” So it turns out that Andy is actually Mr. Lipham’s son and has been building log homes with him for 10 years. That explains alot! And what a great team they make…we are fortunate to have them both on our team.
Mr. Lipham and Bingo supervise as Andy lends a hand where needed
father and son discuss the days progress
off they go with a few of the rest of the crew to get in a bit of fishing down at the dock
By the time we pulled out, the cabin had taken on quite a transformation from the previous day and once again, we were completely amazed and thoroughly impressed be everyone involved in making it so.
Although we had initially arranged for our mechanicals contractor, Todd Hawkes, to line up an electrician, with the sudden unexpected arrival of the Battle Creek building crew, we had to go to plan B. We needed to begin the wiring as soon as possible as it has to be done while the log cabin is being built, unlike a standard home construction, where you can run the wire after the framing is complete. Fortunately, Mr. Lipham had an electrician that he’s worked with previously who happened to be available and was willing to drive up from Alabama to help us out. Within moments of meeting Andy, we were thrilled to have him join our team and it soon became clear that he knew a little more about building log homes than just running wire.
Andy and Mr. Lipham discuss the supplies we will need for the wiring
haha…no one warned Andy that I’d be recording his every move
drilling holes in the basement for the wiring
running the wires
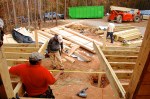
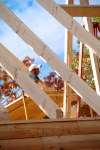
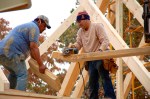
The wiring having been started and framing of the rafters done, things were running pretty smoothly until, in the course of inventorying the timber that was still left, three large lamibeams were discovered. Since all the heavy timber beams were in place at this point, the crew went back to review the blue prints to figure out where they should have been. It was at this point that it was discovered that there were two sets of plans on site that were being used. The difference between the two, one being an engineer set, showing lamibeams in place of the heavy timber beams that run the length of both the ceiling of the first floor as well as the roof peak. Since it was the engineered plans that had been submitted for the building permit, that meant in order for us to pass inspection the solid timbers that were already in place would have to be switched out for the lamibeams which are slightly stronger.
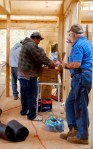
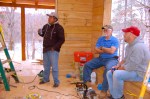
While the crew broke for lunch, Dave, Mr. Lipham, and José discussed what needed to be done.
the crew on their lunch break
Andy and Mr. Lipham join the rest of the crew
Miguel shows us the day’s catch
Bingo checks out the fish
“hmmm, I wonder if anyone would notice I took just a bite”
Bingo tires of the fish and makes himsefl at home in my vacant chair
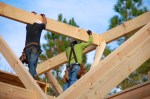
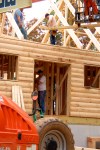
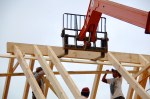
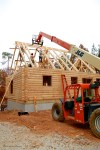
A bit of a set back to say the least, but Mr. Lipham, José and our fabulous crew took it in stride and, their main concern being to do things right, wasted no time in switching them out. That meant un-building much of the roof and first floor ceiling structure that was already in place.
Dave, Mr. Lipham and José
putting in temporary structure to support the roof rafters while they replace the timbers
unbuilding the roof timber
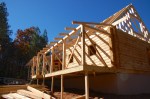
our building crew busy at work on the roof system
side view of the temporary boards the crew has placed
the forsaken lamibeams
up goes a lamibeam
must be cut to fit
removing the solid timber beam
success!
now to lift the lamibeam into place
first one in place!
and the second one
re-nailing the rafters
both beams successfully replaced!
–
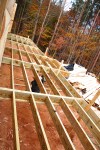
Having successfully replaced the timbers on the roof peak, the crew switched their attention inside to the three beams that run the length of the first floor ceiling.
removing the temporary flooring from the second floor
solid timber in the kitchen/dining area is unattached
un-attaching the master bedroom rafters
removing the solid timber beam
bringing in the lamibeam
heavy, very heavy…
jokes log craftsmen play on one another- drop one end of the heavy timber leaving your buddy to carry the entire thing
Mr. Lipham steps in to lend a hand
even Andy pitches in to help
just a little higher guys!
re-attaching the rafters
newly replaced lamibean
the lamibeams, though stronger than the solid timber, are slightly smaller so shims were placed to fill the gap
Although it put the crew a full day behind, we were all relieved that they were able to successfully replace all the beams with relatively few complications. Hopefully that will be the last little hiccup during the building process!


Recent Comments